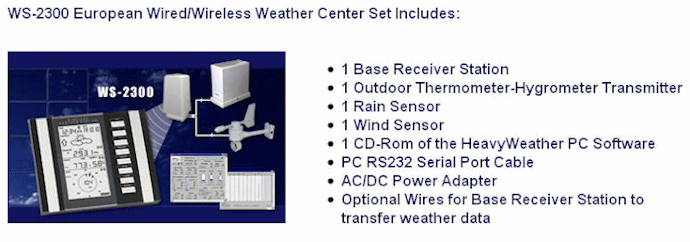
Construction Of The Weather Station
Background Options_Study Prefeasibility_Study Construction Location_&_Performance
Background
It was a dark and stormy night. A classic line to start off a story about a weather station, but unfortunately that line has already been taken by Edward Bulwer-Lytton, curse his oily hide.
My story starts in October 2007, my wife's birthday was approaching in November and I was going through the normal agonising process of trying to find the perfect gift (or more accurately ANY gift). I knew she was interested in recording weather data, her father Eric had tracked daily rainfall on the farm for over 30 years. I came across an electronic weather station, which being a techo gadget I was naturally drawn towards. I did some limited searching on the net and it seemed to be a good unit and the price was fair (back in the days of yore when the Aussie dollar stood tall and proud). So after all the usual agonising, thinking and general ginning around I did something unusual and I actually went out and bought the present.
The weather station was well-received and locations for the weather unit were discussed and it was decided that I would build a proper looking weather station to put the instrument in. And so the construction project commenced. Like all good projects it has to go through a number of required phases. You need to do an options study to explore the possibilities, then refine and focus the list during the prefeasibility stage, moving on to fully develop plans for a single design during the detailed feasibility stage and finally with all the planning done and the scope locked away construction can commence.
Options Study
The options study considered a range of potential locations for the measuring instruments. While mounting the wind and rain sensor on the roof high off the TV antenna pole, would provide the best measurements, installation and ongoing maintenance would be challenging.
There was also the normal interference a project manager expects from upper management, who wanted something that "looked nice" and was a "garden feature", all concepts abhorrent and redundant to an engineer. However recognizing the inevitability of "upper management gets what upper management wants" I conceded to making something that would look nice in the garden.
Prefeasibilty Study
And so the prefeasibility study began. Searching on the web I found a host of weather forums and bloggs which provided a vast array of ideas. The key options I examined were:
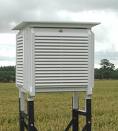
The real thing. A Bureau of Meteorology approved weather box is called a Stevenson's screen and this is what they look like:
![]()

![]()

Detailed drawings specifying the layout of a Stevenson screen can be downloaded here. It is a complicated build, but technically correct and a worthy challenge.
Other quick and easy options examined included flowerpots or plastic bowls stacked together. But these looked tacky, just like plastic bowls stuck together.

![]()

By this stage planning was proceeding well but yet to enter the detailed feasibility stage. Then what every project manager dreads occurred, more interference from upper management. My wife started making remarks like "it was nice you bought me a weather monitor for my birthday and it would be even nicer if you installed it before my next birthday". The idea of a two-for-one offer was incredibly appealing to me, but given her next birthday was only a week away construction and installation of the weather station was unlikely to happen within the required time frame. But like all good project managers I made bold promises and prayed for some biblical rainfall event so that I could call force majeure.
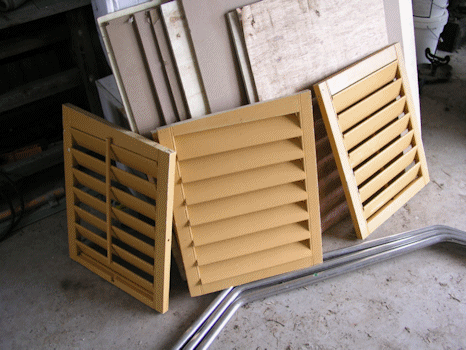
In order to fast track the construction schedule a major scope change was required and instead of building the weather station from scratch a couple of old louvered doors were to be cut down to make the four sides of the weather station simplifying construction considerably.
Construction
The detailed feasibility stage was rushed through in an uncomfortably short period of time and construction started. I had hoped to take a stack of photos along the way showing progress but during the key construction days the camera had flat batteries and upper management was pressing hard for progress to be made. The original aspiration, a proper Stevenson screen is shown below on the left and the finished product (image on the right), using the louvered doors, ended up looking pretty good anyway. By this time it was early January 2009.

![]()
![]()
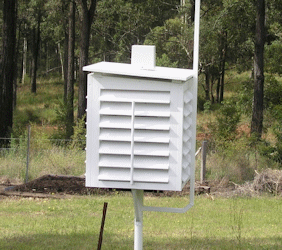
The correct surface finish for a weather box is a lime wash. Studies have shown the lime wash having a non-absorbitive finish gives a slightly lower average temperature than the same design finished in a modern acrylic paint, see here and here. However, the lime wash has to be reapplied every two years (sometimes sooner) and that falls short of my desired maintenance schedule. So I went for liberal coatings of a matte finish white acrylic outdoor paint, supposedly good for 15 years.
Location of Station and Reliability of Data
The location of the weather box is also critical for it to give meaningful results. As shown here and highlighted below there are some very obvious don'ts.

![]()

The weather stations shown above form part of the official network used to provide us with global weather data.
The location of my weather station is not ideal. The house and garden are on the leeward side of a large wooded hill and the site is very well sheltered from the prevailing winds (that's why we built there). The Westerlies could be howling on the other side of the hill and all we will get is a gentle breeze. Hence I was not fussed by the short pole the anemometer sits on. Wind speeds at the house will always be much less than experienced in the general area. The temperature and humidity sensor should be fine. The wooded hilly location means the weather station won't get the early morning or late afternoon sun but the daytime and nighttime minimum maximum will be fine. Screening from the prevailing winds means that temperatures will tend to be a bit higher than the general area. The rainfall measurement should be fairly accurate as the only obstruction is the anemometer and it sits off centre on the other side from where most of the weather comes in from. But I do expect I will have to edit the rainfall record from time to time to remove garden sprinkler events.
The other local problem I need to contend with is wasps that build mud tombs everywhere, especially in sheltered areas and narrow openings as it saves them building walls.
![]()
![]()

The narrow openings around the temperature and humidity sensor would be prime real estate for wasps. So the entire sensor package sits within a fly screen cage to keep the wasps out still allow a free flow of air.